Add a AWS S3 Link
The Database and Scope have been selected.
Step 1: Add Couchbase Link Reference
Click the LinkRef button in the Links Table ToolBar. This will bring up the list of choices:
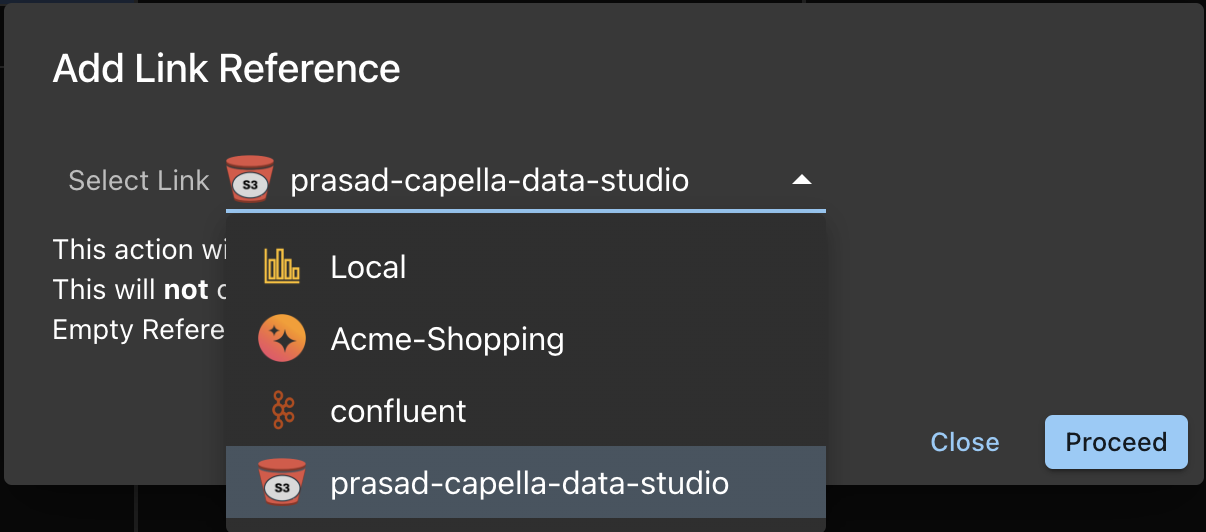
After adding the Link Reference, you will see the link
- Click on the Link Reference
- This will enable to Add Collection button
- Note that the Link has not Connect switch.
Step 2: Add Collection
Now let's add collections from the Source AWS S3 Bucket. We will add 2 types of file as an example
- Parquet Files
- CSV Files
Add Collections (parquet)
Click the Add Collection and you will get this form:
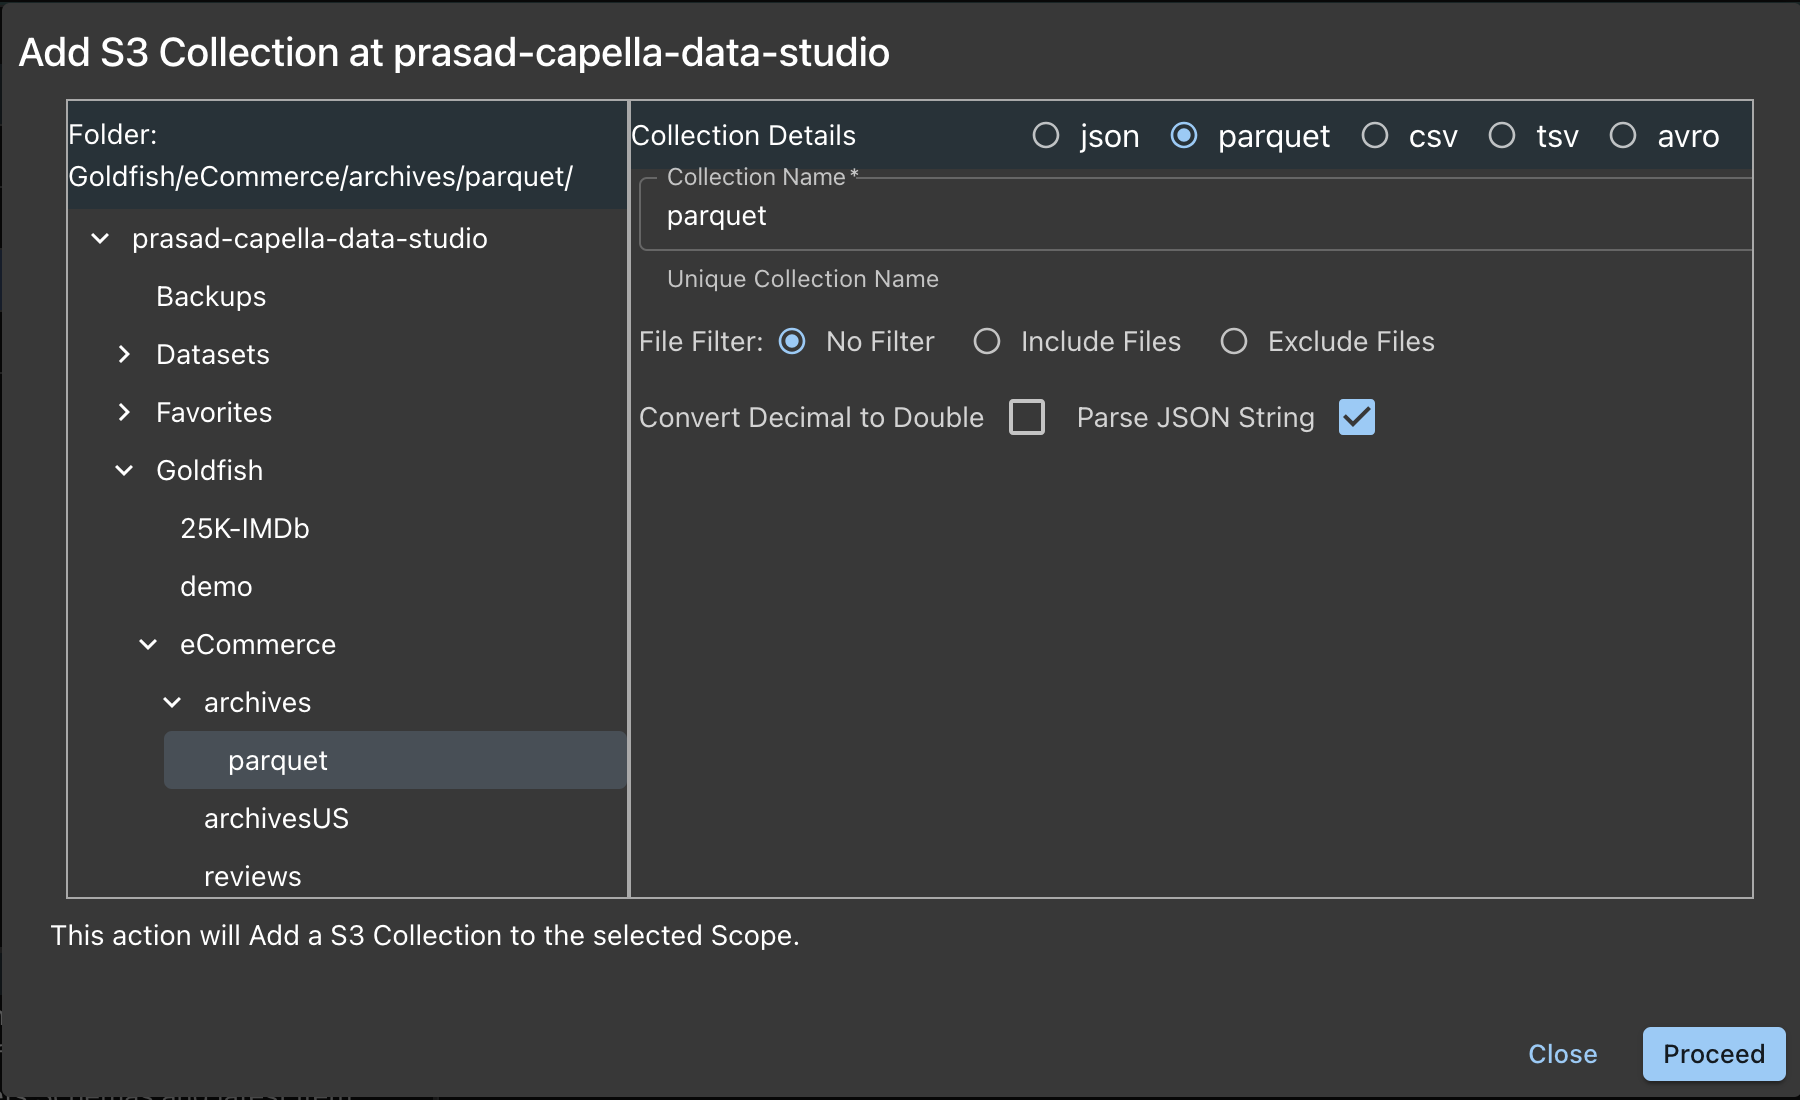
- Choose the Folder from the left Panel
- Choose the file type on the right Panel
Lets see the options here:
- Name: The Folder name is chosen for you, and you can change that if you want.
- File Filter: You can choose to have no filters or a exclude filter or an include filter.
info
What is a file filter?
In the filter box, enter the names of the files to be included/excluded from the external collection.
The file name may include subdirectories of the location specified by the Path option.
Any files that do not match the specification are included/excluded.
Include and Exclude are mutually exclusive.
The file names may contain the following wildcard characters:* — Matches anything
? — Matches any single character
[ sequence ] — Matches any characters in sequence
[! sequence ] — Matches any characters not in sequence
For example: ["*2018*.json", "*2019*.json"]. - Click on Proceed Button
- This will add all the documents in the chosen Folder.
Add Collections (csv)
After adding the Collection, let's add the csv Collection from the same form:
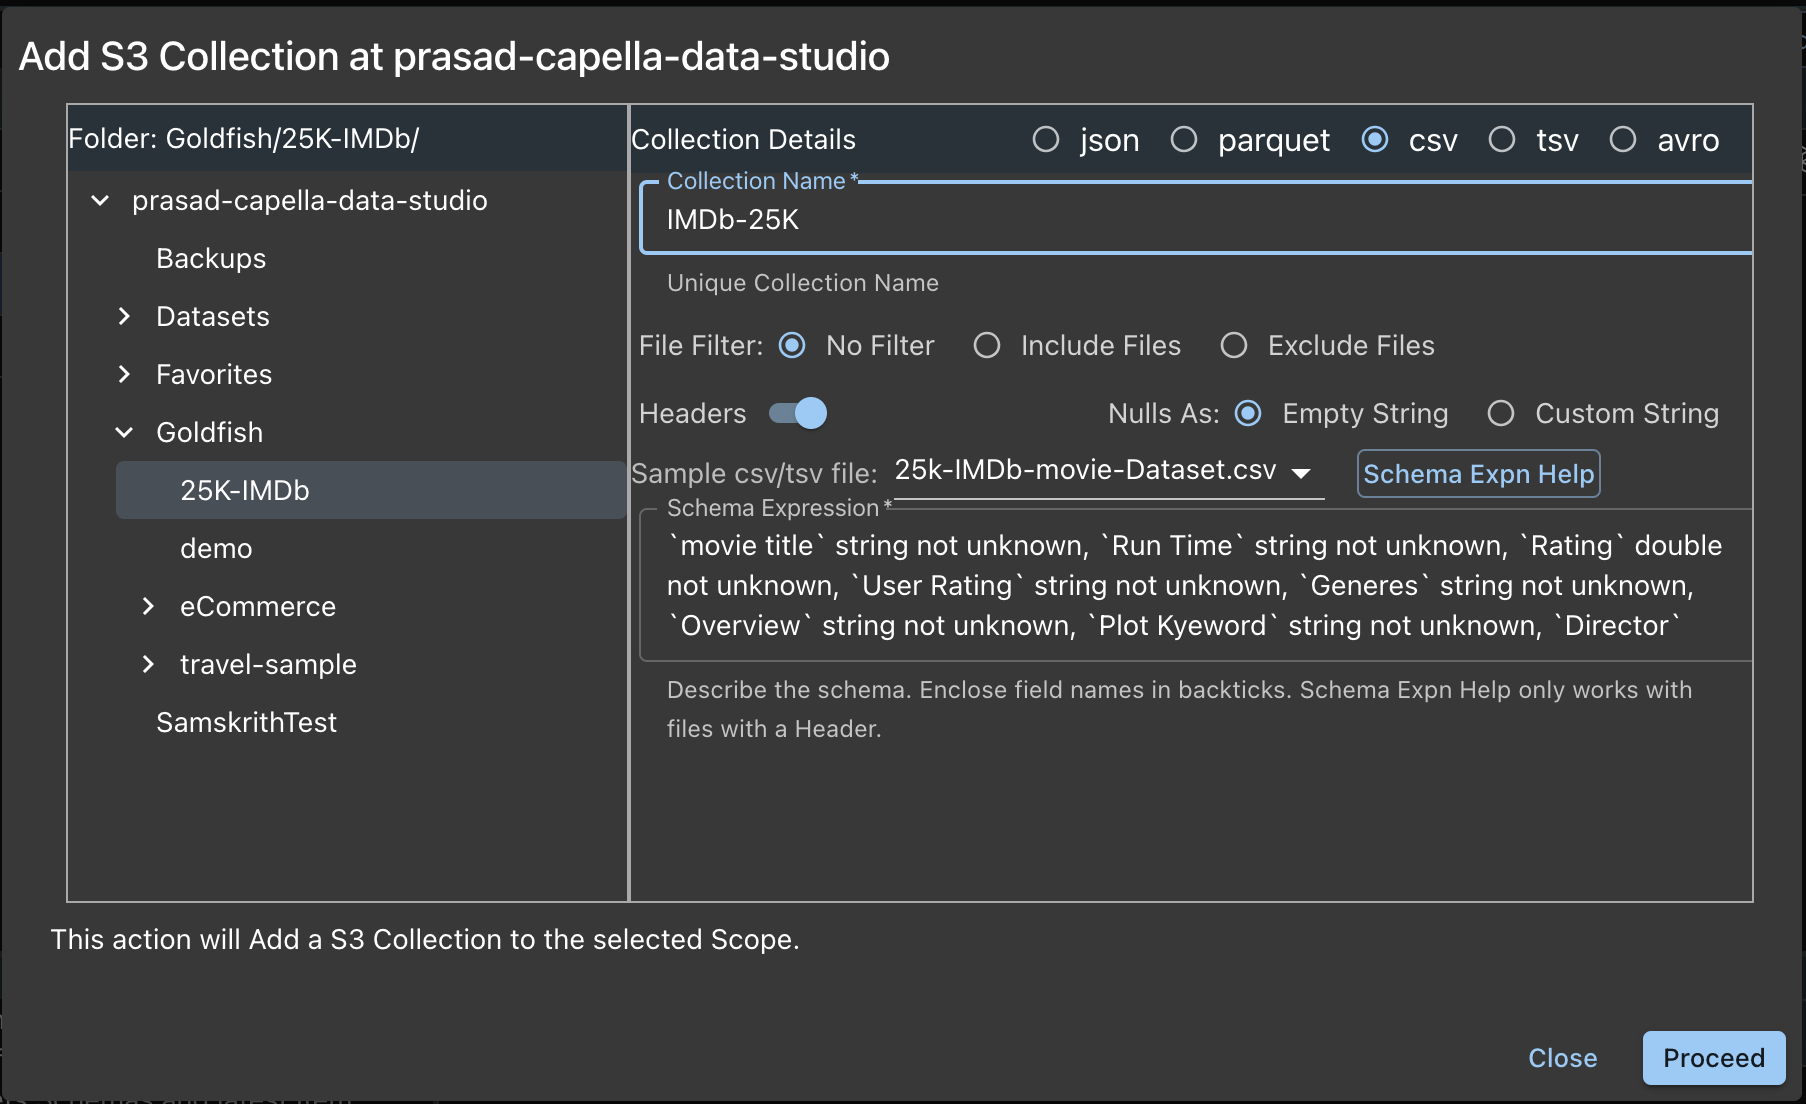
- Choose the Folder from the left Panel
- Choose the file type on the right Panel
Lets see the options here:
- Name: The Folder name is chosen for you, and you can change that if you want.
- File Filter: Discussed above.
- Headers Switch:
- ON: Every file has a header
- OFF: Every file has no headers
Header

The first row is the header.
- Schema Expression
- Schema Expression describes the schema of the collection. Generally, you open the file, look at the headers and build this expression.
- Capella DataStudio comes with a convenient Schema Expn Help button. To use this:
- To the left of this button is a drop down list which allows to to choose a file in Folder. Choose the one with Header.
- After choosing the file, click the button.
- The suggested Schema Expression is displayed in the Edit box. You can Edit this if you want. The format is:
- Field Name: In back ticks
- Type: string | bigint | boolean. You can change if you want
- not unknown: This string means, if the field is not avaialable in the document, ignore that document.
- Click on Proceed Button
- This will add all the documents in the chosen Folder.
Post Add Collection
- The Collections have been added
- Data is fetched, the link is always connected!
- Note that Items still do show the number of documents
- The Schema column still shows a red tick mark
Step 3: Get Schemas (optional, but nice)
- Click the Get Schemas button. It:
- Fetches the item count
- Fetches one sample document and attaches it to the Collection
- Fetches the schema for that Collection and attaches it to the Collection
infoThis is an expensive operation and need to be performed just once.