Standalone Collections and Data Import
Create a standalone Collection and Import Data into it
Remember there is no Local Link. standalone collections are created directly on the Columnar Instance and are really not "linked" to anything. However, in DataStudio, to maintain a consistent UI Experience, standlaone collections are created in he built-in Local Link.
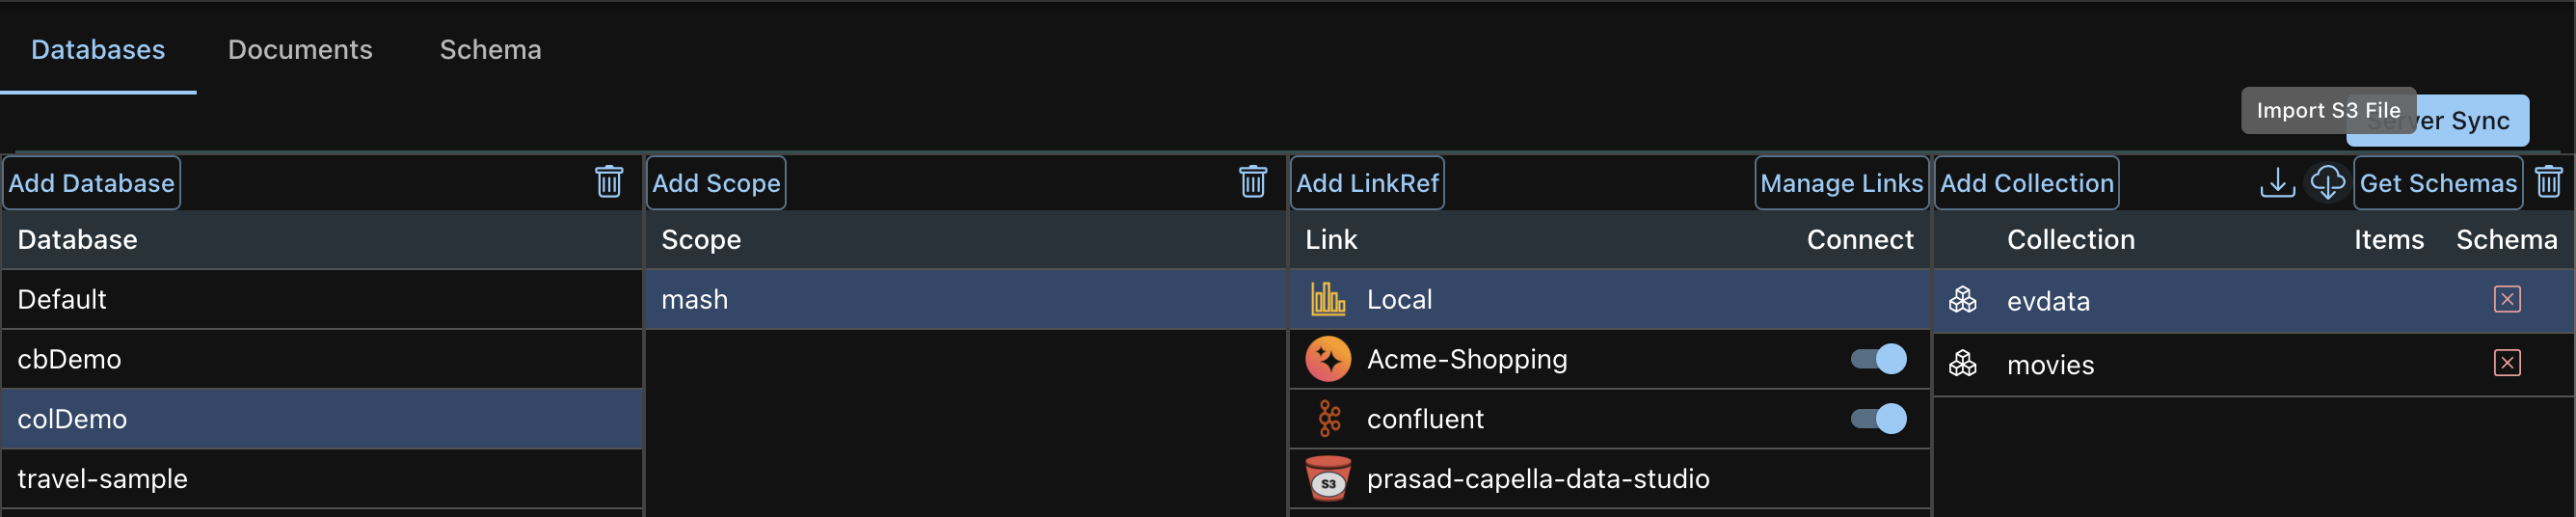
Step 1: Add Local Link Reference
Click the LinkRef button in the Links Table ToolBar. This will bring up the list of choices:
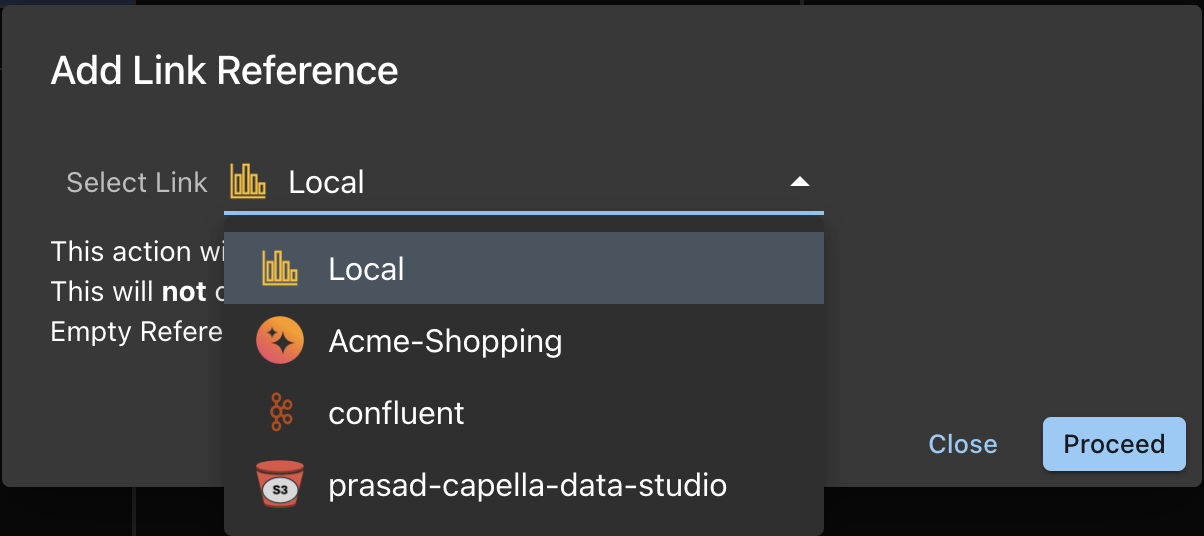
After adding the Link Reference, you will see the link.
- Click on the Link Reference
- This will enable to Add Collection button
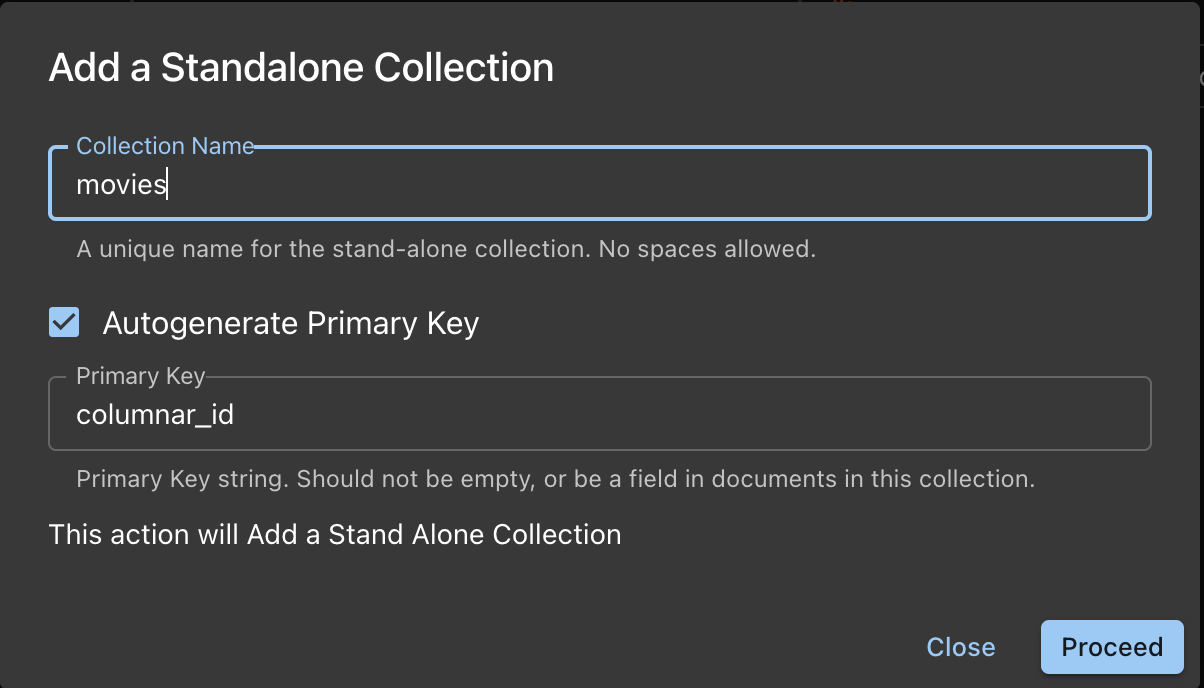
Step 2: Add Collection
-
Name the Collection
-
You need to provide the Primary Key for this Collection
- Option 1: Autogenerate
- The PK is autogenerated as a UUID string
- You can name the key instead of accepting the default columnar_id of you want.
- This is a good, safe option
- Option 1: Specify a comma delimited list of field names and types
- Example: `movie title`: string, `Rating`: bigint
- Do this only if you sure that each document in this collection have these fields.
- Option 1: Autogenerate
-
Once satisfied, Proceed with Adding Collections.
-
The info box shows you the DDL being run.
-
Dataset and Collection is synonymous.
Import Data into Collection: Local File
Now that the Collection has been created, you need to import data into the colection. Let's first consider importing data from a local file on your computer. This data is in a single file and it can be of 3 formats:
File formats
-
JSON Lines: The lines format specifies a file that contains one JSON document on every line in the file.
{"key": "mykey1", "value": "myvalue1"}
{"key": "mykey2", "value": "myvalue2"}
{"key": "mykey3", "value": "myvalue3"}
{"key": "mykey4", "value": "myvalue4"} -
JSON List: The list format specifies a file which contains a JSON list where each element in the list is a JSON document. The file may only contain a single list, but the list may be specified over multiple lines.
[
  {
    "key": "mykey1",
    "value": "myvalue1"
  },
  {"key": "mykey2", "value": "myvalue2"},
  {"key": "mykey3", "value": "myvalue3"},
  {"key": "mykey4", "value": "myvalue4"}
] -
CSV/TSV: Comma or Tab delimited format. File needs to have a header row specifying the field names. The field Types are automatically deduced from s sample row which is the 2nd row.
VIN (1-10),County,City,State,Postal Code,Model Year,Make,Model,Electric Vehicle Type,Clean Alternative Fuel Vehicle (CAFV) Eligibility,Electric Range,Base MSRP,Legislative District,DOL Vehicle ID,Vehicle Location,Electric Utility,2020 Census Tract
5YJSA1E22K,King,Seattle,WA,98112,2019,TESLA,MODEL S,Battery Electric Vehicle (BEV),Clean Alternative Fuel Vehicle Eligible,270,0,43,202233958,POINT (-122.300312 47.629782),CITY OF SEATTLE - (WA)|CITY OF TACOMA - (WA),53033006500infoThe file to be imported needs to have the proper extension.
- JSON (list or lines) need to have a .json extension
- csv/tsv files need to have a .csv or .tsv extension
Process
- Click on the Local Link Reference
- This will enable the Import Icon on the Collections App Bar. There are 2 icons for import. One from Local file and the other from Cloud. We will discuss the former here.

- This will pop up a dialog box for Import.
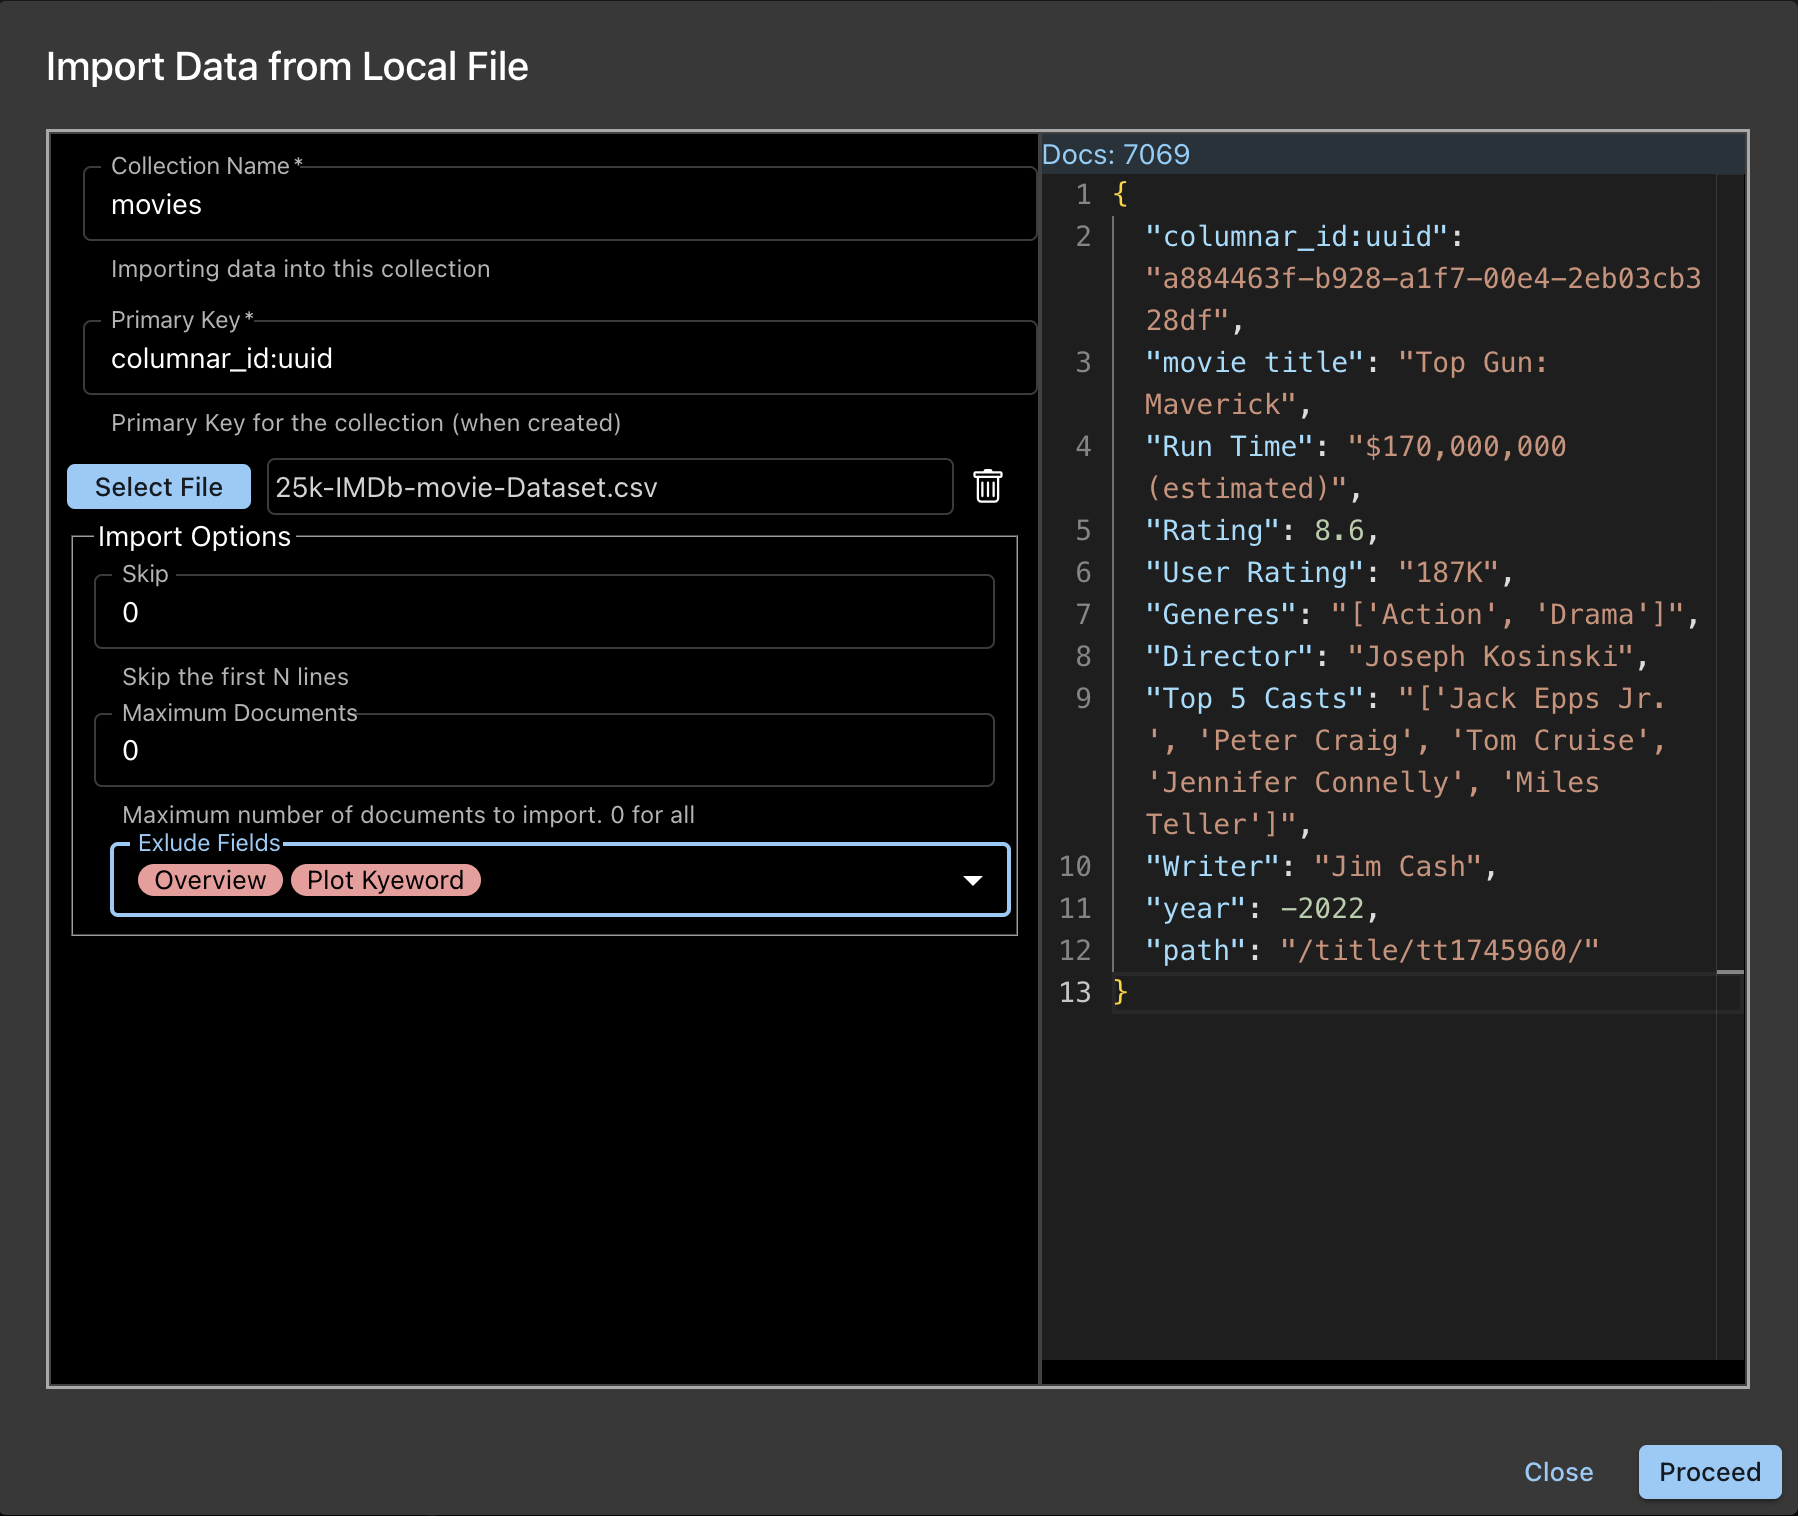
- The Collection Name and Primary Key specified when creating the Collection are displayed as a FYI. These are not editable.
- The Select File button will pop up a file selector. Choose your file.
- The Right side Panel will show a sample document and the number of documents in the file. This is available only for JSON Lines and CSV/TSV files.
- Note: Currently, onn Windows, the number of documents shows 1 extra. The import, however, will import the actual number of documents.
- You have a few Import Options:
- Skip: Nuumber of documents to be skipped before import starts.
- Maximum Documents: Number of documents to be imported. Specify 0 (default) for all.
- Exclude Fields: Fields to be exluded when importing. This is a selector and you can choose the fields to be excluded. Notice the sample document reflect this selection.
- Click Proceed button
info
- Documents are upserted in batches
- There is no file size limit, but this takes time
- For larger files, import from Cloud is recommended
Import Data into Collection: Local File
File formats
File formats and requirements are same as above
- Import from Cloud, imports ALL files in the Amazon Folder
- The process actually implements the COPY INTO function, and this can be done from the Query Workbench too.
Process
- Click on the Local Link Reference
- This will enable the Import Icon on the Collections App Bar. There are 2 icons for import. One from Local file and the other from Cloud. We will discuss the latter here.
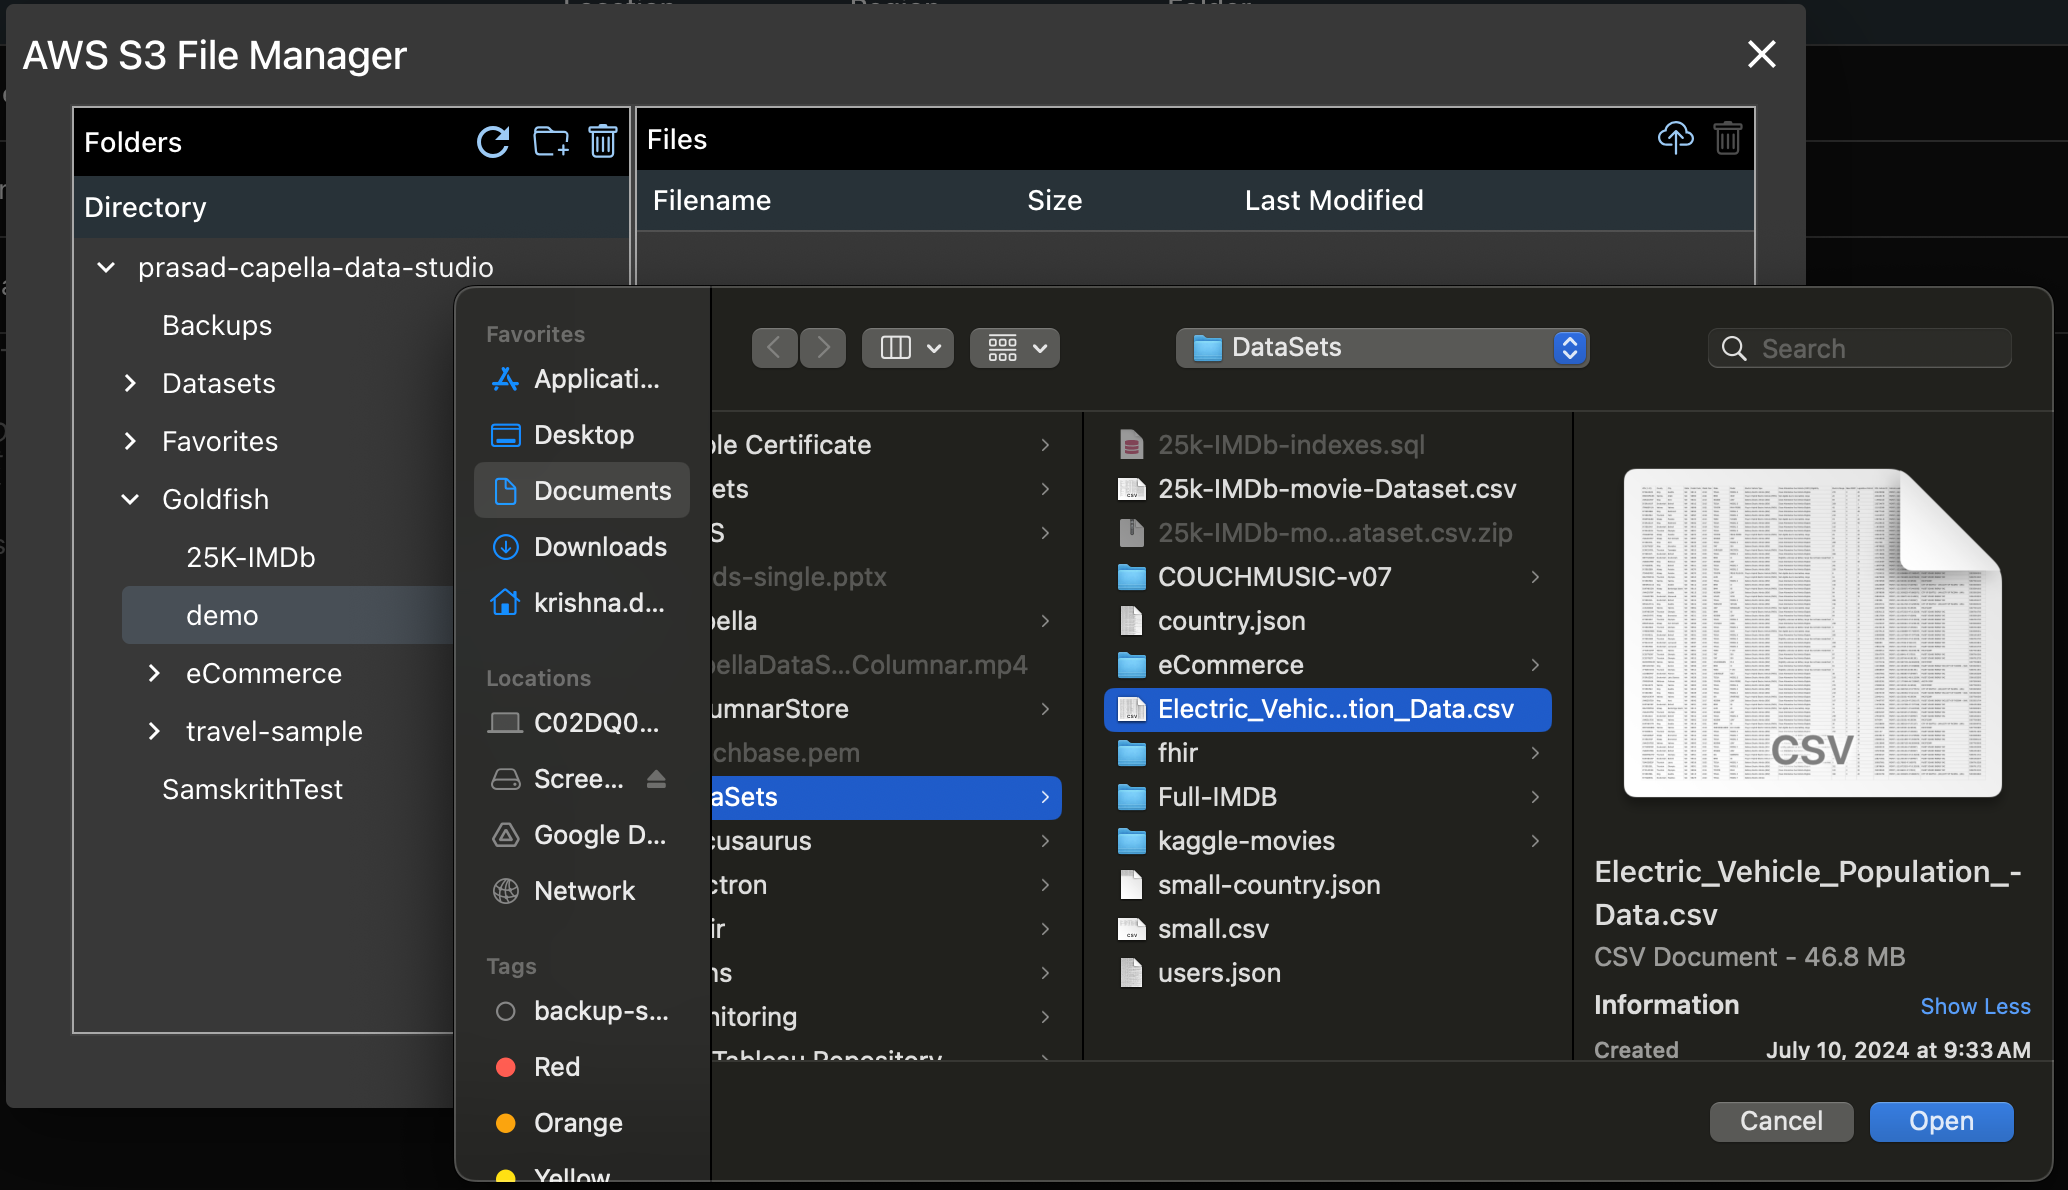
Uploading File to Amazon S3
- You can use Capella DataStudio to upload the file to your Amazon S3 Bucket
- Navigate to Stores from the Navigation Panel
- Choose the Cloud Store
- Click the S3 File Manager to open it.
- In the S3 File Manager, create a folder is necessary and choose it
- On the ToolBar in Right Panel, click the Upload to Cloud Icon
- This opens the Local File Browser. Select the file you want to upload
- Upload Progress is shown and will disppear after its done.
 info
infoYou may have to Navigate away to to the folder.
Back to Import Process from Cloud
- Click the Import from the Cloud Icon
- This brings up the Import Dialog Box
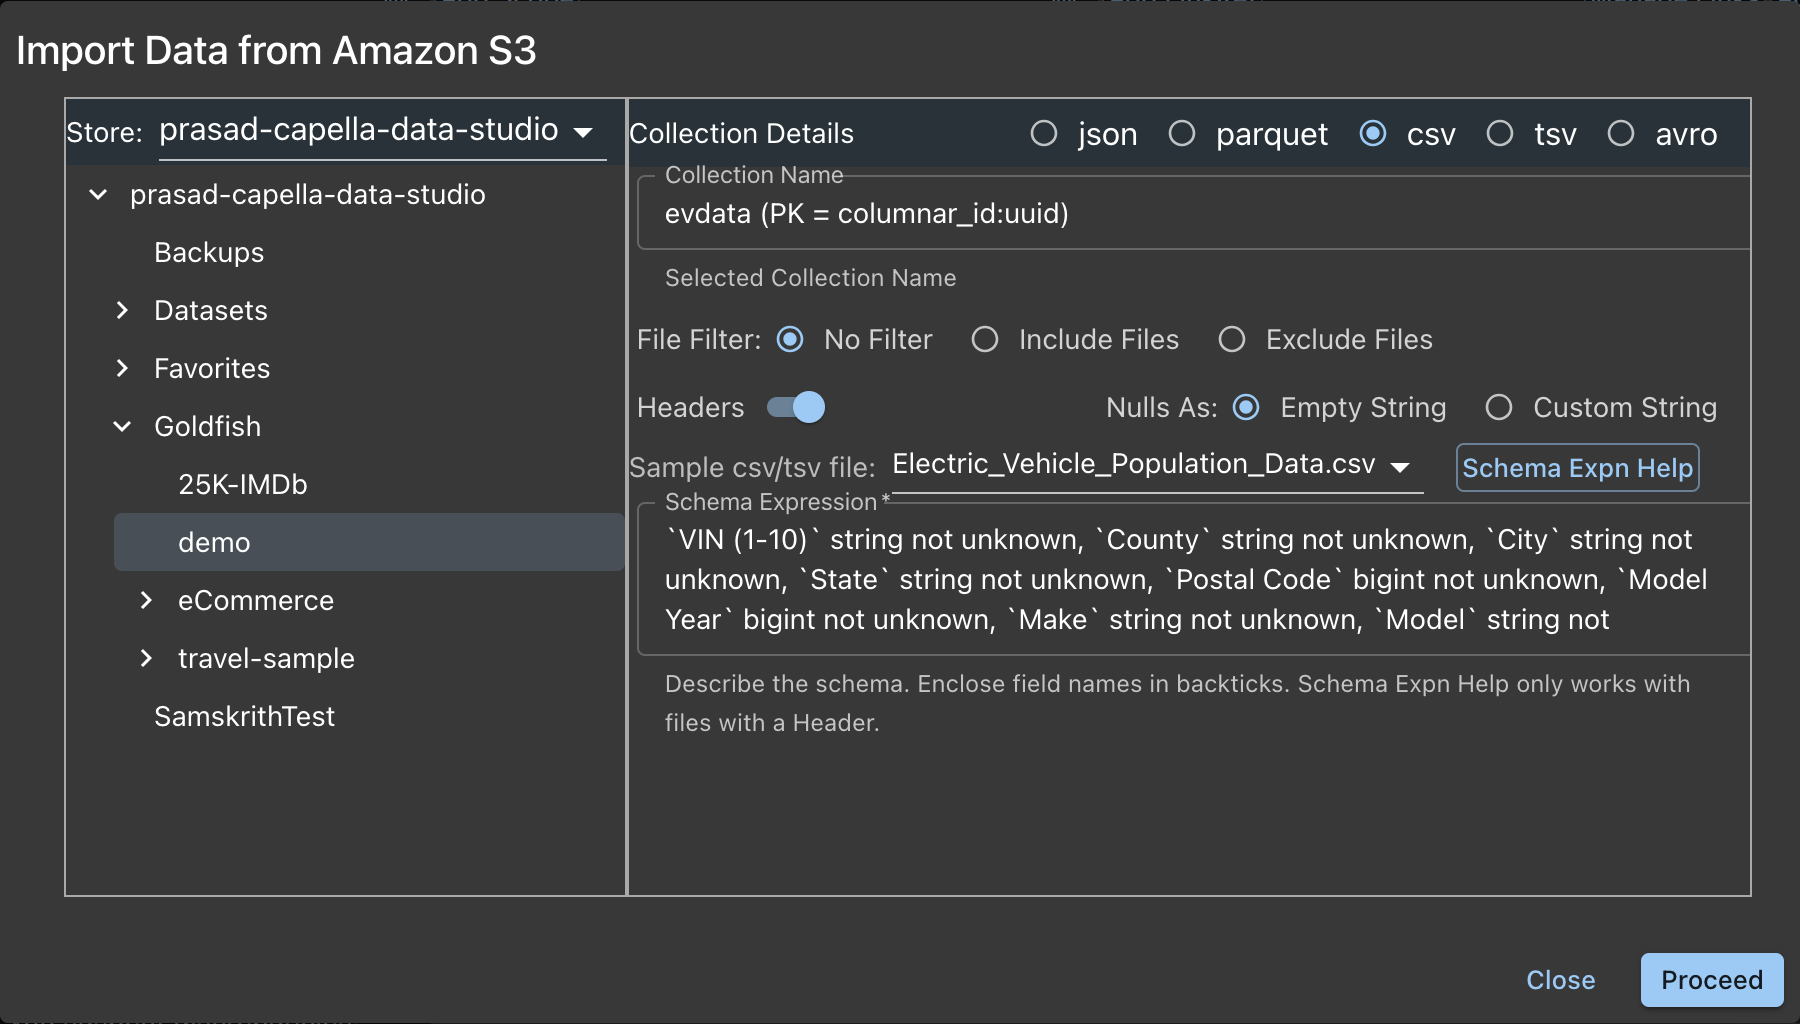
- Left Panel
- Select the Store (if you have more than one)
- In the Files folder, choose the Folder where the data file is
- Right Panel
- Choose the File Type. In our example, this is a CSV file.
- The Colection Name and the Primary Key is displayed in a Read-Only box as a FYI.
- You have some Import Options
- File Filter
- None : Default. No Filters
- Include Files: Wildcard filter.
- Exclude Files: Wildcard filter.
- Headers: First row of File is the header with Field Names
- Nulls As:
- Empty String: Fields with nulls are replaced as empty strings
- Custom String: Any string
- Sample csv/tsv File: Select a sample file (if you have more than one) in the Folder.
- Schema Expression: Describe the schema of the file.
- Field Name, Field Type not unknown
- not unknown is optional. This means that if the field is not there in the document, that document will be skipped and not imported.
- Field Name, Field Type not unknown
- Schema Expn Help: Button to make above task easier. Clieck this as the Expression is generated for you based on the Sample file.
- You can edit the generated schema to you requirement. For example, remove not unknowm or the Type (string/bigint/double/boolean) suggested
- Click the Proceed button

- File Filter
Step 3: Get Schemas (optional, but nice)
- Click the Get Schemas button. It:
- Fetches the item count
- Fetches one sample document and attaches it to the Collection
- Fetches the schema for that Collection and attaches it to the Collection
infoThis is an expensive operation and need to be performed just once.