Columnar Instance
Connect to a Capella Columnar Instance
You do not need to create any databases in Capella Columnar before connecting
Connecting to Capella Columnar Instances
From the Add Connection drop-down button, choose Capella Columnar

Tags
Tags are a convenient way to classify connections and filter Connections on them. For example, they can be used to:
- Classify connections as Production or Development
- Classify connections by Projects
You can optionally Tag each Connection. This can be done before or after the connection is made. To configure the Tags, click on the Configure button located to the left of Connections. This will open up a Tags Dialog box:
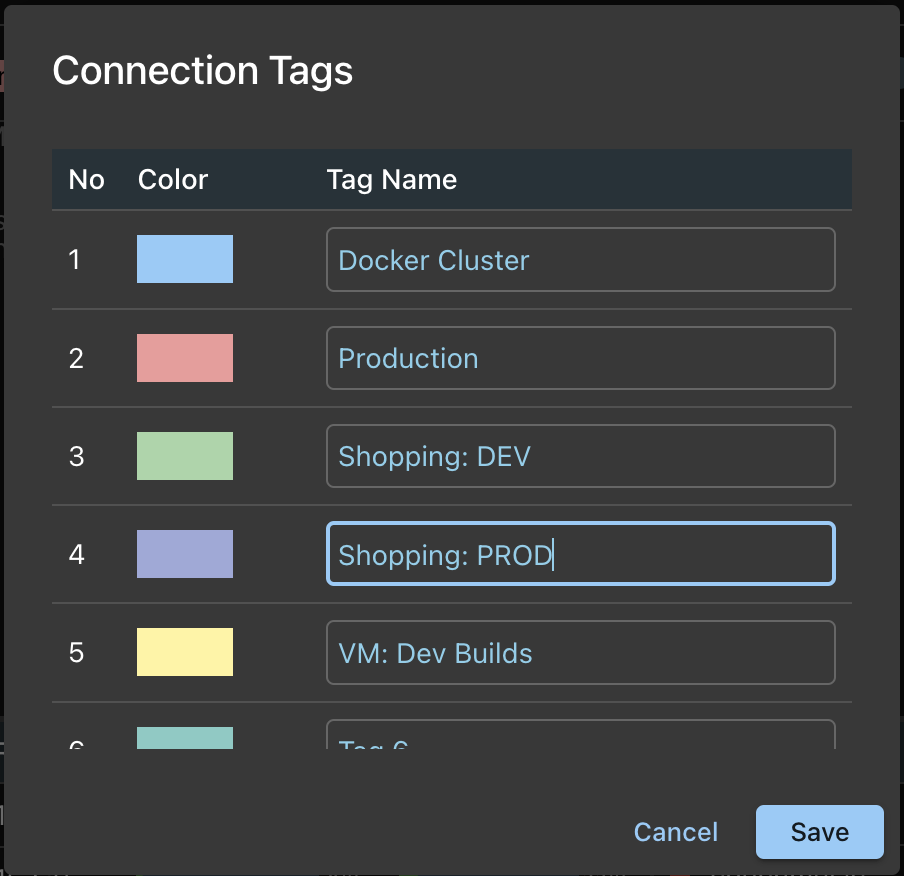
- You have 10 Tags to choose from. Scroll down to see the complete list
- Choose the color you are interested in and name the Tag.
- Do this only for the Tags you are interested in. Yiou can skip Tags. It need not be in order.
- Remember, you can always name the Tags and modify the connection Tag, post connection too.
Connect Form
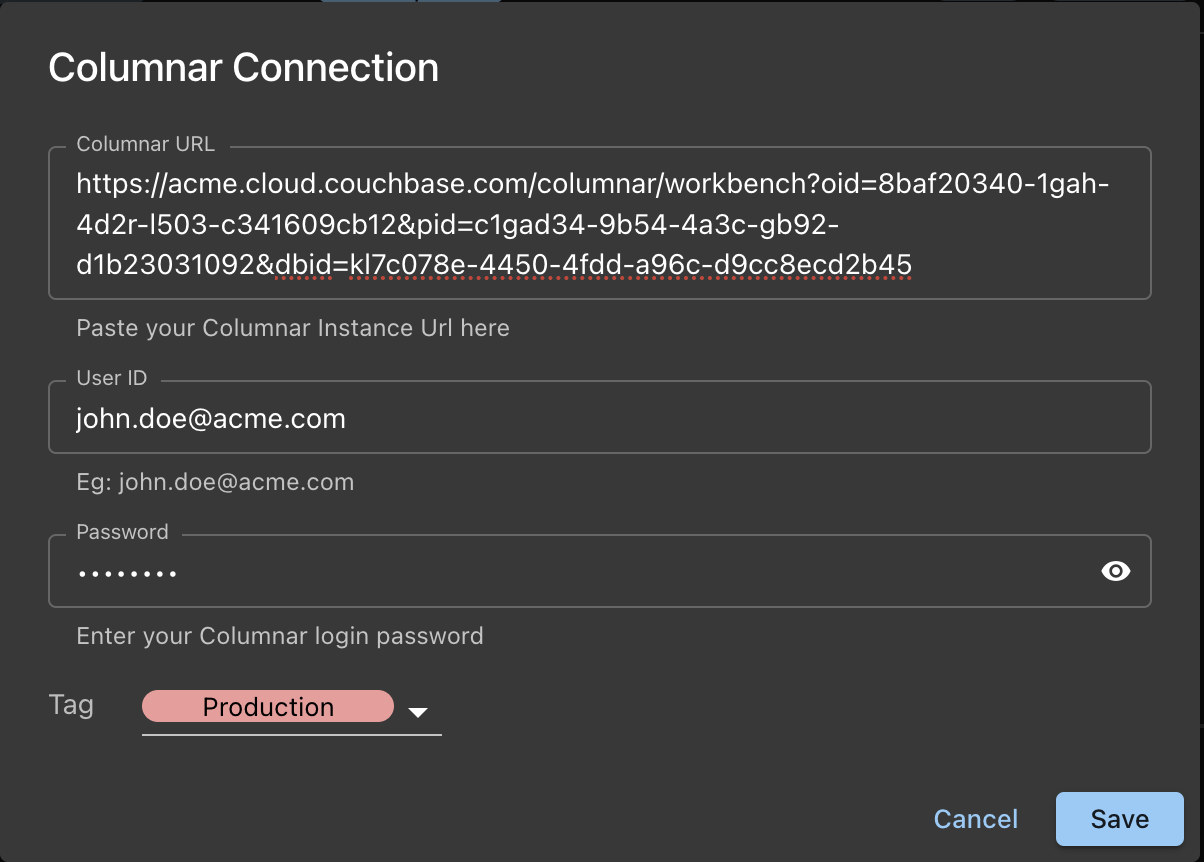
The above example shows a connection to a Capella Columnar Instance.
- Columnar URL: Cut and paste the complete URL of your Capella Columnar instances
- The userid/password are your Capella Columnar UI login
- Choose the Tag (optional)
The Connection Process
- Capella DataStudio connects to the instance using the form details.
- It fetches the details of all the existing databases (scopes and collections)
- The list of databases is fetched only at connection time.
- Any databases added from the Capella Columnar UI will not get reflected in Capella DataStudio. In this case, you will have to refresh the connection.
- All details are kept in a encrypted DataStudio Store locally.
- All passwords and secrets are encrypted using the native OS encryption. On Mac, this is Keychain. Keychain uses AES-256 for encryption, the strongest encryption method.
- The encrypted passwords are not actually stored in Keychain. They are still stored in Capella DataStudio Local Store. Keychain is used only to provide encryption and decryption services.
Post Connection
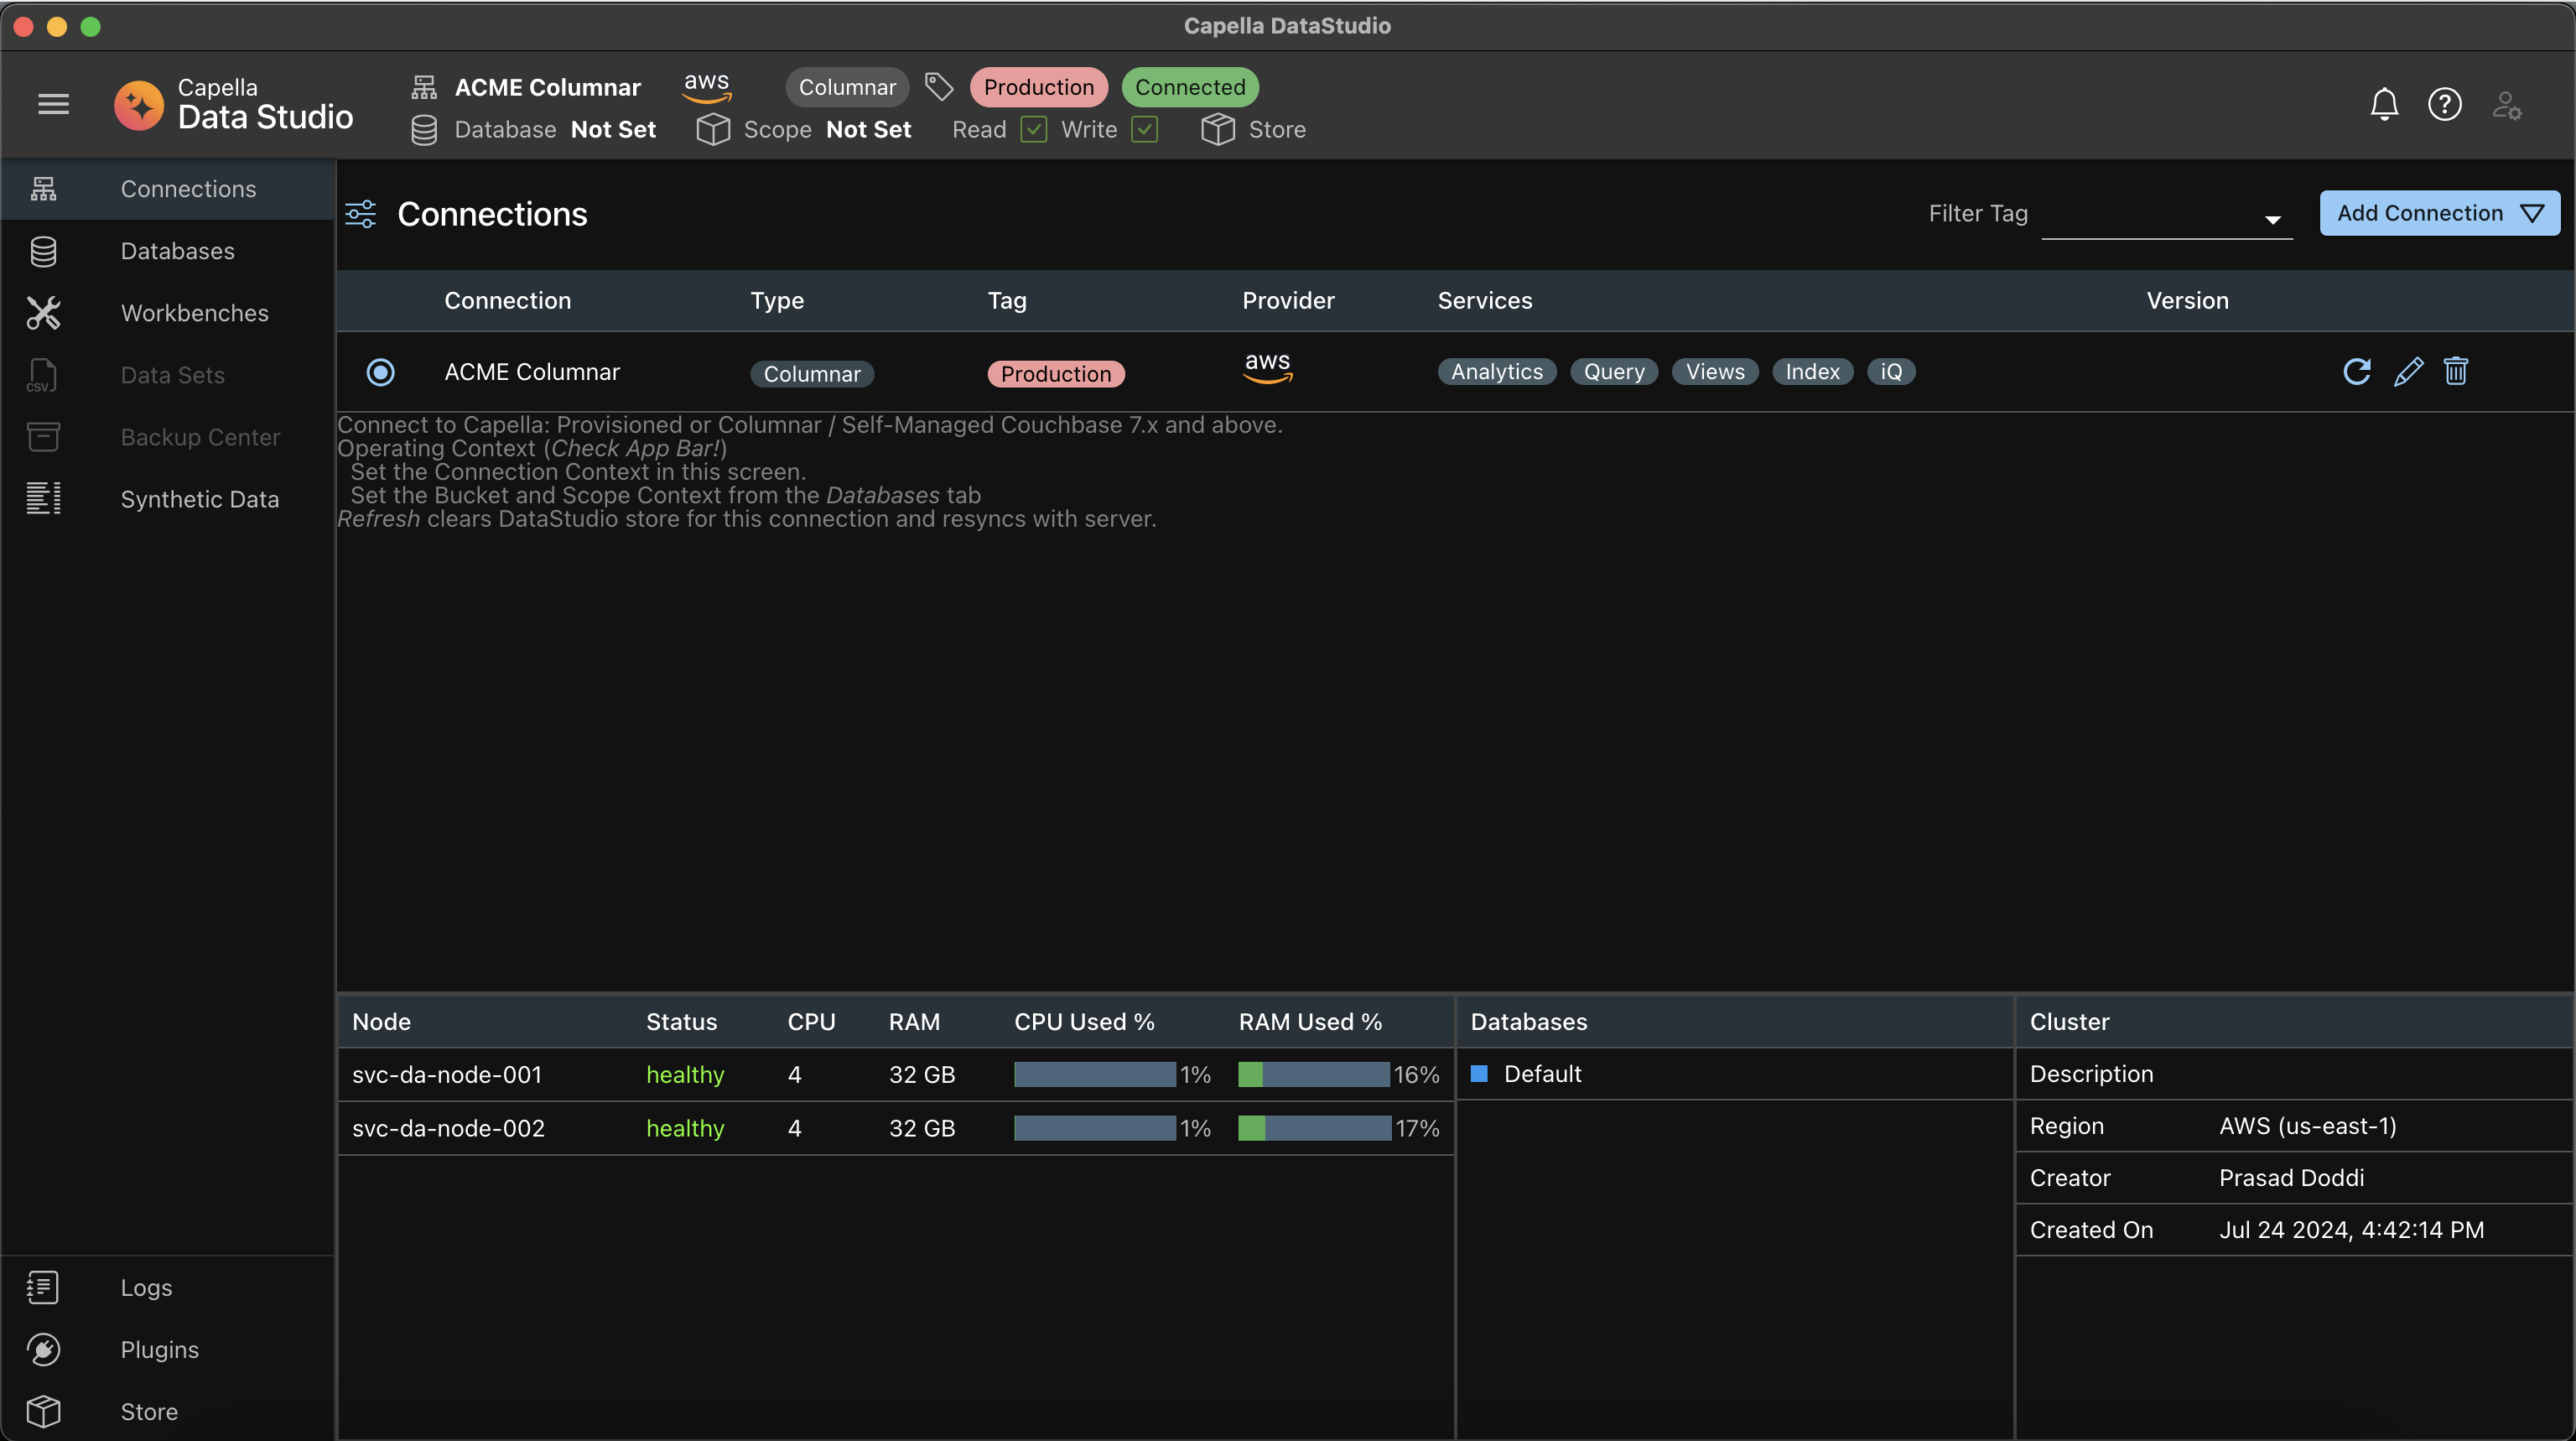
If your connection is successful, you will see the details in the Main Panel.
 Lets now take a look at the details provided
The Connection Row
Use the Radio Button on the start of the row to choose the connection.
- This now is the Active Connection The row shows the details, including the services which this instance is running. At the end of the row, there are 3 action buttons:
- Refresh: This deletes all the connection details from the DataStudio Store and reconnects. YOu will typically be using this under these scenarios:
- Databases have been added/deleted directly from the Capella UI
- Edit: This only allows you to change the userid/password.
- Delete: This deletes all the connection details from the DataStudio Store. Note that this action has no effect on the actual cluster itself.
The AppBar
The AppBar shows the details of the Active Connection It also shows the Active Database (aka Bucket) and the Active Scope
- These are chosen randomly during the connection process.
- Remember to set them from the Databases menu option fromm the NavBar
The Footer Tables
These show some details of the instance, like the number of nodes, their CPU and RAM usage. The tables also show the existing buckets.
Active Connection
The Connection Table shows all your Connections. However, only one is Active and that is chosen by clicking on the Radio Button. Passwords are decrypted only for the Active Connection and kept in memory.
When you restart Capella DataStudio, you will notice that none of the Connections are Active. You will have to choose to activate a connection. This is due to security and the way passwords are decrypted only on the fly.
Tip
Set the Active Connection Context from this UI.